Now I am doing my E-Wallpaper In Photoshop.
Step 1: Open a New Documents for my Wallpaper.

Step 2: Import a Texture into documents.

Step 3: Duplicate the texture and change the blend mode to Color Burn and Multiply to each other layers.

Step 4: Open a New Layer and double click on the layer to open LAYER STYLE. Change Gradient Overlay to below settings.

Step 5 : After apply the effect, should be like this.

Step 6 : Import another image which i have downloaded from Internet. This is a grass texture.

Step 7 : Now using a grunge brush let's mask part of the layer. Select the grass layer and go to Layer>Layer Mask>Reveal All. Then using the grunge brushes with white start masking the layer. In order to make it look more realistic, go to Layer>Layer Style>Drop Shadow. Use Multiply for the Blend Mode, 100% for the Opacity and 90º for the angle.

Step 8 : We have done our background. Now I am doing the grass text. To do that, i found a nice pretty grass.

Step 9: Type in the EARTH DAY word. I chose Swiss 924BT. And adjust the font size. After that set the text out in white and set it to Overlay and like 50% Opacity.

Step 10 : So here i am tracing it. I use the Pen Tool(P). I tracing the text follows individual blades of grass. That way when the final cut-out they will look like pieces of grassing sticking out.

Step 11: After I've finished my path, It will have a new Path in Path Palette. Double-click the path to get the selection and go back to your grass layer.

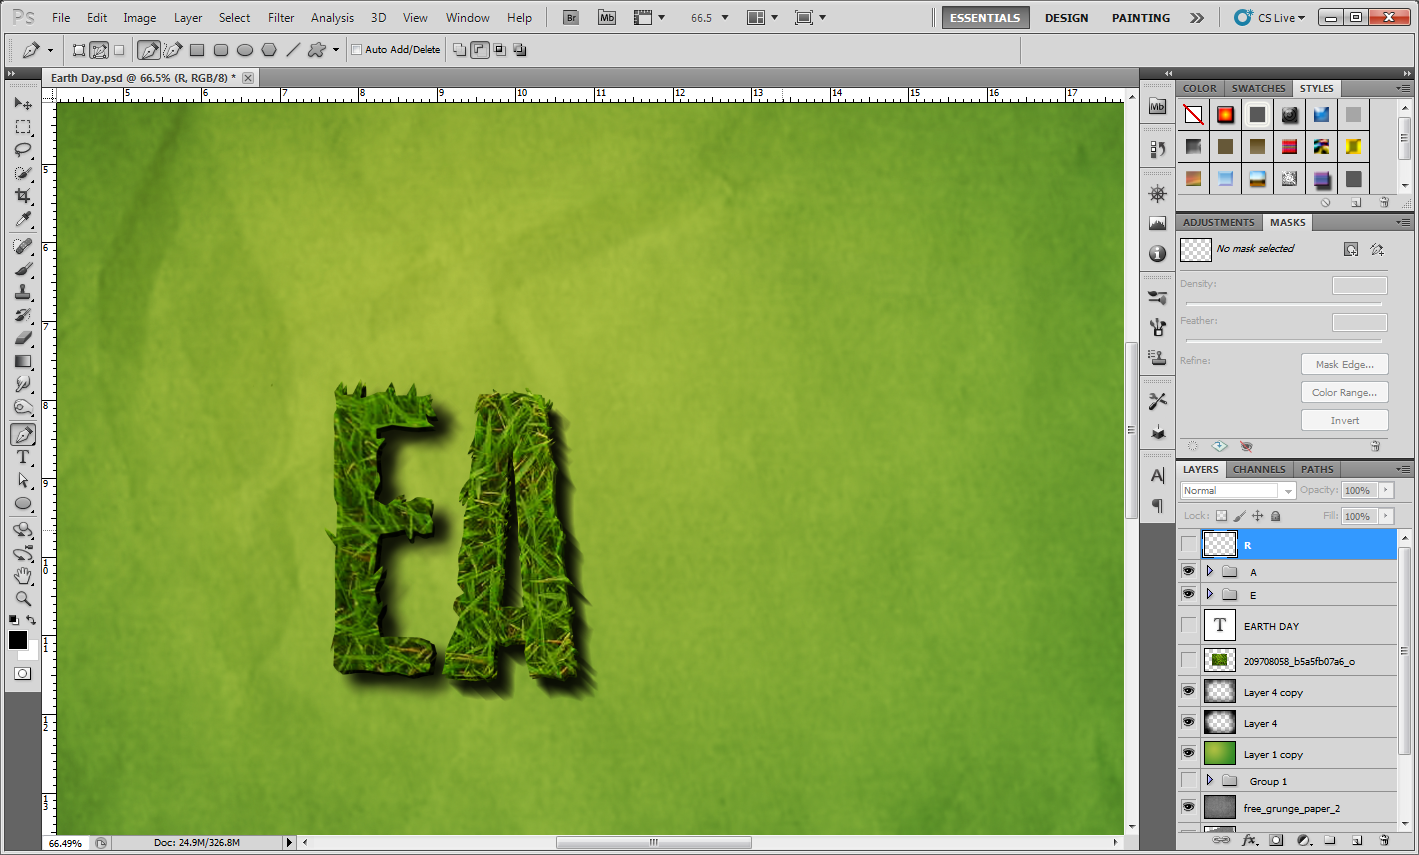
Step 11 : Invert the selection (Ctrl+Shift+I) and cut away the excess grass. Now you can see the cut out "E" part.

Step 12 : Now I have a "E". I want to make it more 3D and more depth on it. So I adjust the shadow and add some effects on it.


Step 13 : After adjust the shadow, we have the results.

Step 14: Now duplicate that layer, then clear the layer style off the duplicate, so we can add some more styles. Here’s the second set of layer styles. I change the Opacity to 51% so it’ll blend in with the previous layer)

Change the duplicate layer to this setting.


Results after adjustment:

Step 15: I want to add some shadow on it. This idea is to make a three dimensional look. So Ctrl-click the grass layer and then in a new layer below, fill it with black. Then press the down arrow once and the right arrow once and fill it again, then repeat over and over until about 5 steps.


Step 16: Apply Filter > Blur > Motion Blur on shadow with a 45′ angle and a distance of about 30. Then set the text to a low opacity of about 50%.


Step 17: Now we have a nice shadow. But still not enough. Now i duplicate one of the layer to separate the "E". to gain more shadow area.

Step 18: I moving those pieces into the shadow areas, to make it look like there is grass sticking out and it's real 3D object made from grass! To do this, I use the Burn Tool (O) to darken them appropriately.

Now we have done the "E", but I still need to do other word. Continue using the same technique to create a same effects on the other word.


Finally I done the whole word.

Step 19: After done the EARTH DAY, I am going to add some quote on it. I using TEXT TOOL(T) and text in some quote which searching in google.
 |
| I also apply some drop shadow on it. |
Step 20 : After that i want to add some insects picture on it.

Step 21 : This is a butterfly picture, I want to remove the white area. So i using MAGIC WAND TOOL to remove it.

Step 22: After that, I place it on the "Y", and also apply some DROP SHADOW on it. To make it more realistic.

Step 23: I also insert a ladybug on it.

Step 24 : This time, I will not using the MAGIC WAND TOOL to remove the area background. Because it is not suitable to use it on this picture.The background got a lot of color and it is complicated. So i decide to use the Polygonal Lasso Tool to cut it out.

Step 25 : After cropping. Put some shadow on it.

Step 26: I also add others insects on it and place it nicely.

Step 27: Import a EARTH APPLE into my WALLPAPER.

Step 28: Remove unwanted area using lasso tool. Place it nicely and put a shadow on it.

Step 29 : After that i put the EARTH DAY date on the Earth Apple. It is 22 APRIL. After using TEXT TOOL(T) to type in the date, i also adjust the blend mode to overlay and adjust the opacity. To make it more curve and sphere, Filter > Distort > Spherize , amount 50%


Step 30 : Now I want to add a rainbow on it. To create it, I using Gradient Tool (G). I choose the presets setting- TRANSPARENT RAINBOW

Step 31: Drag the Tool From Right to Left , You will get the below result.


Step 33: Adjust the Rainbow to the position what i want.

Step 34: After that, I add a mask on the rainbow, to make the rainbow more feather and soft.

Step 35: Duplicate the rainbow and move the layer below the"EARTH DAY" layer to have front and back rainbow through the TEXT.

Step 36: At the last, I need to add some adjustment on my wallpaper, I add a layer and some gradient on it. And using mask to remove the area which I don't want.

Step 37: Add another layer called White light. I using RADIAL GRADIENT TOOL to put some white soft light on the top of the EARTH APPLE.And make the blend mode to OVERLAY, OPACITY 42%

Step 38: I also add a Dark Border on it. I using BRUSH TOOL with black color and a very low OPACITY AND HARDNESS and brush on the border.

Step 39: Duplicate the Border layer and apply Filter > BLUR > GAUSSIAN BLUR , 50 PIXELS.

THIS IS MY FINAL E-WALLPAPER.
WE ARE DONE!!!

LAYERS